After creating a visual support, you can refine and personalize it further. All editing tools are accessed by clicking the pencil icon while viewing a creation.
Use the quick prompt links to:
Type your own instructions to make specific changes:
Ella updates the text across all pages based on your instructions. You can undo and redo changes, and your full edit history is available for the duration of your session.
To edit a single page rather than the whole support, uncheck "Apply to all" before submitting your prompt.
Modify a specific part of an existing image while keeping everything else the same.
Use when: You want to replace one object, update a minor detail, or keep visuals aligned with a child's current items.
Example: Replace a pillow with a stuffed giraffe toy in a bedtime routine visual.
Remove an element from an image.
Use when: A background element is distracting, or you want to erase an unwanted object or person.
Completely recreate an image with new content while maintaining the art style.
Use when: Characters are performing the wrong action, the environment is incorrect, or you need a completely different scene.
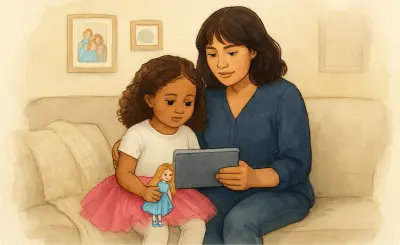
Add your own photo to a visual support.
Use when: You need a photo of an actual environment or object.
To restore the original image, open the Gallery and select a previous version.
Change the visual style of one or all images without recreating the entire support.
Use when: You want to try a different art style, or need to match visuals across different supports.
Tip: Uncheck "Restyle x images" to restyle only the current image.
Replace the character in an existing creation while keeping all other content the same.
Use when: You want to use a different character in an existing support.
Tip: Uncheck "Apply x images" to swap the character only in the current image.
The Gallery stores all previously generated images from your creations. You can browse and reuse them in new supports, or use them to restore a previous version of an edited image.
When editing, open the Gallery to select any previously generated image.
Note: Pages beyond 10 cost 1 extra image credit per page.
Read-aloud in any language: Press the play button to hear the support in the selected language.
Translate into multiple languages: Translate the same support as many times as needed. Switch between languages using the navigation arrows.
Share a translation: Click the share icon while viewing a translated version to copy a link directly to that language.
Editing the support in English will automatically update existing translations.
Ella supports 70+ languages, including:
European: Albanian, Bosnian, Bulgarian, Catalan, Croatian, Czech, Danish, Dutch, English, Estonian, Finnish, French, French (Canada), German, Greek, Hungarian, Icelandic, Irish, Italian, Latvian, Lithuanian, Macedonian, Maltese, Norwegian (Bokmål), Polish, Portuguese (Brazil), Portuguese (Portugal), Romanian, Russian, Serbian, Slovak, Slovenian, Spanish, Spanish (Mexico), Swedish, Turkish, Ukrainian, Welsh
Asian: Bengali, Chinese (Simplified), Chinese (Traditional), Filipino/Tagalog, Gujarati, Hindi, Indonesian, Japanese, Kannada, Kazakh, Korean, Malay, Malayalam, Marathi, Mongolian, Punjabi, Sinhala, Tamil, Telugu, Thai, Urdu, Uzbek, Vietnamese
Middle Eastern & African: Afrikaans, Amharic, Arabic, Armenian, Azerbaijani, Dari, Farsi (Persian), Georgian, Haitian Creole, Hausa, Hebrew, Pashto, Somali, Swahili